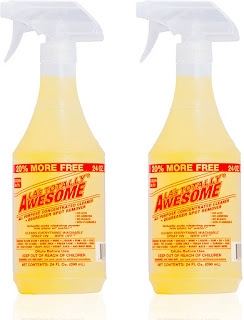
A recent prepping project has revealed an improved method of removing infantry from their strips as well as a new means of stripping old paint off. I had painted up a bunch of infantry, but when I gave them a dark wash, they looked horrible. So, I decided to strip them.
I tried a number of different solvents including Simple Green, but nothing worked. Consulting the web, I found several that were touted to be very effective. Being where I live, the only one I could find was this stuff called LA's Totally Awesome.
I don't know if it is made in Los Angeles, or they use it there, but that's the name. Man, did it work well!
In about three days, the miniatures were pretty well stripped of their paint down to the metal. However, the cleaner seemed to have reacted with the metal and left this thin powdery film of oxidation on the figures. Sorry, no pictures, but it would have been hard to see much anyway. A normal tooth brushing could not remove much of it. In comes the Dremel brush.
A metal brush tool would probably have been safe on metal this hard, but I opted for nylon brushes. They worked pretty well and buffed off most of the oxidation and any paint that still clung to the figures.
Now onto second half of the story.
I got them cleaned but now the issue was to cut them out. This part I dreaded. In the past, I have used my Dremel tool with a cutting wheel to thin out the base between two figures and it seemed to work well.
I started doing this with this batch of infantry, but for whatever reason, more figures where having their legs broken at the knees! What saved me was a pair of pliers. To clean off the oxidation from the figures, I held the strip with the pliers. I did the same while using the cut off wheel, holding them tightly between the figure to be cut off of the strip and the one next two it, which usually was the one that got broke off at the knees. My guess is that the vibration of the cut off wheel on the metal broke off the legs. As I said, this metal is very strong, but very brittle. Holding the strip tightly reduced the vibration and allowed me to thin down the base to snap off the miniature successfully.
So, happy ending! I got the figures stripped and enough cut off to mount them onto their bases with no further leg casualties in the process.
As a note of caution, I could not get absolutely all of the oxidation material off of them. Also, the metal is no longer shiny but a dull gray. Hopefully, re-priming and painting them will not cause any more oxidation. In the future, I might spray them with a clear coat just to be safe. On larger figures, I still use spray primer, but with this tiny guys, I use a brush on.


No comments:
Post a Comment