Sunday, November 29, 2020

The March Toward 3mm War Continues

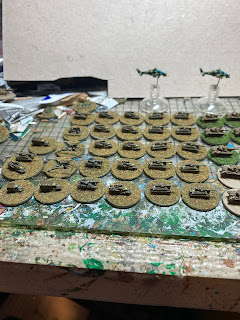
I managed to get a little hobby time in during Thanksgiving break. I wanted to clean off my bench, at least in terms of figures strewn across the table, so I went back and forth between 15mm fantasy and 1/600 stuff. Its probably been a year now, but I bought a whole mess of 1/600 AFV and infantry from Just Jack. He was running an pretty cool ImagiNation campaign with his son, but it didn't seem to last long. He sold them plus a bunch of WWII minis of the same scale. I've been slowly swapping out the stands to fit in with mine. However, in the spirit of "I want to play a game before I die," I left a bunch on their original stands and flocked some of the ones that still need flocking.

A side track to the side track of my original Gambusia campaign is that the nation of Aquor-Ornur is planning to attack an ally of Lavonia, Symbalia. If you read that original post, they have a tiny army but is funded by and large by the USA. Well, two things, first it got transplanted to the world of Bovatopia and second, its army and airforce grew a lot.

MBTs
They now have three armored battalions. Their front line tanks are the M48A5 sporting a 105mm gun. In the other two battalions are M47 and Sherman Fireflies. 

M48A5 with Sherman Fireflies behind them


APCs
Their main APCs are M1A3 halftracks. I am in the process of painting up some M113s but have not finished them. 


Artillery and Fire Support
The main artillery is some sort of 150 or 155mm field howitzers. I am not sure what they are. They don't seem to be US 155mm howitzers. But I'm not going to be picky. Most rules are not overly finnicky on the type of gun, more on the caliber and type of ammo. 

Just Jack's campaign was over a period time: same nations, different time periods in terms of hardware. So, in addition to the halftracks and the Fireflies, there are a lot of US tank destroyers of WWII vintage. Most of them are M18 Hellcats and a few M10 Wolverines. For some reason, I never liked the Hellcat, but I've got them so, I plan to use them. You can also see in the picture below a towed Bofors 40mm AA gun and a few random trucks.


Attack Helicopters
These weren't a part of Just Jack's collection. I went back and forth between just how advanced A-O's air support would be. I finally on more high tech to offset the low tech ground units. These are actually Chinese Z-10 attack helicopters, but all of these modern attack helicopter look pretty much the same, particularly at 1/600 scale. So, they are supposed to be the Agusta A129 Mangusta. I have had back luck trying to attach the clear rotors that are provided with the models, so I plan to cut out some clear plastic disks and use those.


Source: Aldo Bidini - commons file, CC BY-SA 4.0, https://commons.wikimedia.org/w/index.php?curid=69240249

Infantry
I didn't take any photos of infantry other than the one below. It seems to be a combo heavy weapons-ATGM team. Maybe the machine gunners are supposed to be part of the ATGM team? I have not figured out what the infantry have for LAWs, but I do like these for infantry ATGMs. It might be a Javelin or Dragon, but I'm going to use it as an Israeli Spike MR or LR. Again, at that scale, it can be anything you want it to be.


Source: Natan Flayer - Own work, CC BY-SA 3.0, https://commons.wikimedia.org/w/index.php?curid=5306990

Bonus!
I bought a set of these off of Shapeways. I don't remember who the vendor was. They are the Russian VPK-39273 Volk-3 6x6 APC armed with a 120mm rifled mortar, the 2B17 Nona-K. They are incorporated into the mighty Bovatopian army as much needed artillery support.


Source: Armyrecognition.com January 2014


Friday, October 30, 2020

Weird and Annoying

I wanted to check out an old post dated October 21, 2016 where I play tested and evaluated Thud Ridge air combat rules. I noticed that the post was truncated. As I recall, there was at least two more turns. The way it reads at the end, its pretty obvious that there should be more. Admittedly, its four years old now, but its pretty annoying all the same. Was this due to the "new and improved" update? Already I notice some annoying issues with the Blogger text editor. Unfortunately, I don't have a Word file of this post. I read that you can use Google Docs and then cut and paste into Blogger. For now on, I am definitely going to do this.

Thursday, October 29, 2020

Testing a New Method of Flight Stand

 I dread helicopter models for two reasons. First, they are a pain to put together. They always have "fiddly bits" as they say across the Pond that drive me nuts. This is more of a problem with 1/300 models than 1/600 but I have a hard time attaching those clear plastic disks that represent spinning rotors at that scale. Second, attaching a magnet to the bottom of the model is a pain, particularly on 1/600 models. It is bad enough that those rare earth magnets do not stick well, but the helicopter models tend to be either too narrow, and/or have landing gear that interferes with a good attachment. Some time ago, I was grumbling about this in one of my posts (I grumble a lot). Pahoota of The Solipsist Gaming blog recommended using staples as a bridge between the aircraft and the magnetic stand. So, I tried his suggestion:

1/600 Hind with staple stand bridge

 I broke off a block of four staples from a larger block. They are fused together, but I needed to be careful as it is easy to separate one from the rest. It was a little too long to use as is, so I carefully bent them and then cut off the bent piece. Sorry, I don't have a picture to show what I mean but you can see on the part of the staple that is holding onto the magnet where I cut it. I then glued one side to the helicopter with the other end going onto the magnet. So far, it seems to work ok. One advantage of this is that I can paint the helicopter while holding the stand rather than the model. I've been using staples for paper for 1/600 helicopters but I might try heavy-duty staples for 1/300 helicopters. I think it will also work well for very small aircraft. I recently got some 1/600 Pilatus PC-9s, which at that size can pass for either a Super Tucano or an AT-6B. They have very thin fuselages, so the staple bridge might work better than even a narrow cylindrical magnet.  

Saturday, October 17, 2020

I Got My Life Back!

 My wife and I debate how long it took, but Friday we put in our last floor plank and yesterday, we put the appliances back in the kitchen. There are a few minor things left to do, but nothing disrupting. I'm happy the way our new floor project turned out, but I don't plan to do any projects of this level for a long time.

Wednesday, September 23, 2020

Update: Life Goes On

 Its been forever, or at least it seems like forever since my last post. The culprit: my house. We've been thinking about this for years, but finally, we are remodeling our main floor of our house....pretty much ourselves! The floor is the first, and probably main thing that is being done. 


This is a job for a younger man. Even wearing knee pads, its killing me. My wife is helping a lot, though her constant obsessing with the smallest measurements is not really helping. The other issue is that its only now that we are putting down the floor. The last three weeks have been nothing but prep work. The people who built this house were idiots. But hey, I got to use a nail gun! And, my Dremel tool has been put to good use cutting the flooring. I also learned to take all YouTube home-improvement videos with a huge grain of salt. Nothing every goes as smoothly as they show (see above comment about the idiots who built this house). 

So this is the state of things for now.  Laundry, washing dishes, my teaching, all that other stuff have gone out the window. I'm lucky that my kids get fed. My hobby daydreams are the closest I get to things for now. One other thing I want to mention. I am a lucky man to know people who can lend some time, even if its just for an hour or two to help. Both my boss and a friend from church who is a retired software engineer who seems to know a lot about this stuff and has almost all the tools I need have been helping a lot. Without them, I'd be swimming in quicksand.

Tuesday, July 28, 2020

Tale of 3mm Woe

I am finding more and more frustration as I dabble in 3mm/1:600 scale armies. The frustration is with the infantry. When it comes to WW2 and Modern ground forces, Oddzial Osmy (sold by Pico Armor in the USA) is the only game in town. The issue is that they are cast in a very hard metal. I don't know what the alloys are in it, but its a lot harder than miniatures like GHQ that use a lot less lead if any. I totally understand why this hard, brittle metal is used, BUT the problem comes down to the infantry. They are on strips. The infantry needs to be cut from the strips. Unfortunately, the sculptor didn't put deep enough break points between each figure so that they easily snap off. A good pair of wire cutters are needed. The issues that I've had include figures flying off into space (thank god for safety glasses) to only get lost in the carpet, and due to the brittle nature of the metal, a number of figures break off at the knees. 

A recent prepping project has revealed an improved method of removing infantry from their strips as well as a new means of stripping old paint off. I had painted up a bunch of infantry, but when I gave them a dark wash, they looked horrible. So, I decided to strip them. 

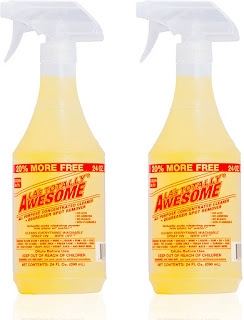
I tried a number of different solvents including Simple Green, but nothing worked. Consulting the web, I found several that were touted to be very effective. Being where I live, the only one I could find was this stuff called LA's Totally Awesome. 

I don't know if it is made in Los Angeles, or they use it there, but that's the name. Man, did it work well!
In about three days, the miniatures were pretty well stripped of their paint down to the metal. However, the cleaner seemed to have reacted with the metal and left this thin powdery film of oxidation on the figures. Sorry, no pictures, but it would have been hard to see much anyway. A normal tooth brushing could not remove much of it. In comes the Dremel brush.


A metal brush tool would probably have been safe on metal this hard, but I opted for nylon brushes. They worked pretty well and buffed off most of the oxidation and any paint that still clung to the figures. 

Now onto second half of the story. 
I got them cleaned but now the issue was to cut them out. This part I dreaded. In the past, I have used my Dremel tool with a cutting wheel to thin out the base between two figures and it seemed to work well. 


I started doing this with this batch of infantry, but for whatever reason, more figures where having their legs broken at the knees! What saved me was a pair of pliers. To clean off the oxidation from the figures, I held the strip with the pliers. I did the same while using the cut off wheel, holding them tightly between the figure to be cut off of the strip and the one next two it, which usually was the one that got broke off at the knees. My guess is that the vibration of the cut off wheel on the metal broke off the legs. As I said, this metal is very strong, but very brittle. Holding the strip tightly reduced the vibration and allowed me to thin down the base to snap off the miniature successfully.
 

So, happy ending! I got the figures stripped and enough cut off to mount them onto their bases with no further leg casualties in the process.


As a note of caution, I could not get absolutely all of the oxidation material off of them. Also, the metal is no longer shiny but a dull gray. Hopefully, re-priming and painting them will not cause any more oxidation. In the future, I might spray them with a clear coat just to be safe. On larger figures, I still use spray primer, but with this tiny guys, I use a brush on. 

Saturday, June 20, 2020

Air Strike: Modern Air Combat for the Whole Family! A Brief Review

What a wholesome title for some rules! I previously mentioned these rules. I finally, after much pleading with my 8-year-old son, I played ONE game. I think my hopes for a son who will game with me is shrinking. He's too hung up on Fortnite :(  Red in the Morning blog as a much more detailed review than this.

Basically, you use playing cards to move, turn, fire missiles and guns. Cards are also used to outmanuever enemy missiles. You are dealt four cards and its a matter of card management because number cards allow you to move and turn, but face cards have the additional bonus to fire missiles and how "accurate" the missile is (how strong your radar lock is?). They also act to defeat the missiles. So, if you have a launched missile that is a Jack and you opponent has a Ace, Queen, or King in his hand, he can use it to defeat the missile. You always play two cards per turn. Once the cards are used, they are discarded and you get to draw two new cards.

There are some quirky aspects of of the game. The main quirk is missile damage. If you get hit by a missile, the card used becomes the damage. The odd thing is that in order to get shot down, you have to be hit with the same face card. In other words, if I got hit by a Jack, I'd have to be hit by another Jack to get shot down. So, it would seem that it is possible to survive at least four times by missiles if your opponent is unable to attack you with the same face card. Another funny thing is the turns. Not a big deal, but you can turn up to 90⁰. What is a bigger deal, and maybe I'm not reading it right, but you can rotate a full 180⁰ without moving. Finally, guns are in the optional rules. Guns have a longer range than the missiles, though missiles can move multiple times and turn to track its target. Unlike missiles, guns will knock out a plane with two hits, the suit of the card doesn't matter.

I wanted to photograph the game with my son, but unfortunately, between his gaming and my my needing the phone for talking and texting work colleagues (I'm taking this pointless online course on how to teach online), my battery was down. The game lasted all of about 15 minutes. There was no limit on the number of missiles we had. There was a lot of maneuvering including some fly-bys. We managed to take several missile hits before he hit me again with the same face card that was in my damage pool. I tried to get him to play again, but he wanted me to have a LEGOs with him.

I would say this is a very good game if you want to play something fast, or if you've got some campaign going and want to quickly resolve any air battles. There are no differences in stats. A jet is a jet. The optional rules contain ones for ground attack aircraft, ECM aircraft, and SAMs. My plan was to play a second battle with the boy using the SA-2 missile site I had finished, but that was a no-go. *SIGH*

I have bunch of ideas for tweaking the rules for a little more granularity. But as Queen Catherine of the Red In The Morning blog said, it may not be a simulation of the hardware, but is a good simulation of the decisions airmen make during combat. You can get this at Wargames Vault for $4.50. Quite the deal!

Wednesday, June 3, 2020

1/600ish Block Apartments

I got these plastic models done. As I think I mentioned previously, they are from AliExpress. They are not specifically 1/600, but they are close enough


I painted them in a color scheme that I saw on several visits to China. They tend to paint the bottom-third of many buildings a different color from the rest of the building. I did three colors that didn't look overly flashy. I thought about giving them a wash, but decided they looked ok without. There was nothing behind the windows, so I took some black construction paper and glued it to the inside walls. Their bases are cut from styrene For Sale signs, painted and flocked. In China, you would see rows and rows of these buildings. I think for my purposes, three are enough.

Thursday, May 28, 2020

Major Painting Burn Out

Ennui: a feeling of weariness and dissatisfaction; boredom.

Robert Cordrey wrote about it on his blog a few weeks ago. I've read other bloggers discussing similar issues. For me, I though way back in March that I'd have lots of time for projects, and dare I say it, actual gaming. It seems, however, that the situation has magnified what I have been feeling for a while regarding my hobby. I paint a lot of stuff, make terrain, but never actually play a game. This came to a head the last two weeks. I mentioned back in April and early May that I have been making a lot of progress and multitasking. Things were chugging along. But then, I got caught up in a painting contest on a Facebook groups page. I started working on my entry, a unit of fantasy heavy cavalry. The more I worked on it, the more burned out I got on it. I wanted to make it as high quality a paint job as I could. It seemed endless tedium. I wanted to shelf the whole thing and forget about it, but at the same time, I just wanted to finish the damn thing. Finally, I finished last night. I took some pictures and posted them on the group site that is having the contest. I don't pretend to a great miniature photographer and I really don't have to time nor the wherewithal to take great shots. When I looked at the pictures (see below), I thought, "I spent all this *bleepity-bleep* time working on these things but the pictures don't show most of the detail I put into them!!!"

So, here's some pictures I took of very recent miniatures that I painted. I think these are going to be the last ones I paint for awhile. For now on, I'm going to redirect my efforts to playing games, even if they are board games.

First, a couple of dwarves from Battle Valor Games:


He plans to enter the Gandalf the Gray cosplay contest.

Queen Keona; King Ivan's sister:

Queen Keona is a kitbash. Originally, she was a Battle Valor vampire general. She looked perfect from the photos, and it would be easy to swap shields. However, when I got her, the upper torso was fine and the horse she rode on was fine, but her waist, legs and feet left something to be desired. It was mainly her foot attire. It looked like she was wearing Inuit mucklucks. I've worn them. Great for sub-zero temperatures and snow, silly for riding into battle. Unfortunately, Battle Valor's riders have their lower halves sculpted directly onto to the stead. So, there was no way I could get rid of the legs and use the horse. Fortunately, the proportions and size matched fairly well with Essex 15s. Some poor knight in full plate mail gave his life....legs for the queen. I used one of the many Essex horses I have accumulated over the years. Threw on a standard heater shield and there you go.

A female elf fighter also from Battle Valor:


The objects of my scorn, Battle Valor evil heavy cavalry:


Finally, an impromptu battle scene that includes some Goth slingers from Essex along with the spider warrior that I painted a couple of weeks ago:


They are supposed to be Battle Valor's version of dark elves, but you really cannot tell except some of them have pointed ears if you look close enough. The spiders on the shield were done with Sharpies. The flag was done using Adobe Illustrator.

Its time to box these, like I do so many others, clean off my workbench, start gaming. 


Thursday, May 14, 2020

1/300 Conversion in About 20 Minutes

Yesterday, I made an all out cleaning assault on my pigsty of a workbench. Despite about three hours of work, I didn't get really far, plus all the dust I kicked up made my allergies a nightmare. Under the piles of junk, I found a lone, primed, Saracen APC and a ZU-23-2 23 mm autocannon with two gunners on it. It might have a carriage for it, or it might go onto another vehicle. The APC is an old Skytrex model and the autocannon belongs to H&R. Inspiration struck! So... shaving off the MG turret, pulling out the pin vise and drilling out a hole for the gun, I now have a Saracen with a ZU-23-2 AA autocannon on top.


I think it took me all of 20 minutes to complete, including waiting for the paint to dry. The thing looks incredibly top heavy and kind of silly, but I've seen some jury-rigged technicals that looked a lot more ridiculous. One more weapon to add to the Federal Republic of Gambusia's arsenal.

Sunday, May 3, 2020

Spider + Man

What little time I have in the evening, I've been multitasking like crazy. In addition to experimenting and/or building lots of scenery for 3mm (making cultivated fields has become my new nemesis/obsession), I have been trying to paint down the 15mm fantasy lead pile. Below is the latest fruit of my labors. I think I spent a total of about 8 hours on this one over several days.


He is a general from Battle Valor Games. 

Wednesday, April 15, 2020

1/600 Buildings from China

Back in early January, I stumbled across a bunch of modelling supplies on AliExpress. AliExpress is an online shopping site in China that I guess is connected to Alibaba, though I am really not clear why or how they are different. They are both Chinese versions of Amazon.com, but everything comes directly from the manufacturer. Two other differences from Amazon.com are that they don't seem to sell books and it takes FOREVER for the stuff to get here. The first time I ordered from AliExpress, which was some dice, it took almost a year for them to ship. This time, it was about three months. And regarding what they sell, if you don't know, or are too young to remember, Amazon.com started off selling books before they got into everything else.
I had the fear in the back of my mind that the packages were dripping with Corona virus. I'm going to assume that they are not contaminated, or if there were any virus particles on them, they did not survive the trip. I sprayed everything with some disinfectant anyway.

I got these buildings. They didn't have a scale assigned to them, but the dimensions seemed like they were roughly 1/600. I ordered a few just to see what they looked like. I have yet to paint them. You be the judge.


These two appear to be small office buildings. They don't seem to have entry ways. The windows on the ground floor almost touch the ground. I assume the small structure on the roof is a stair access.


I bought three of these. They look a lot like large Soviet style, high rise apartment blocks. These apartment complexes are still very much around today throughout cities in China. Many of my in-laws live in such buildings. Like the previous buildings, there doesn't seem to be any doors. At first, I thought the two towers might be for elevators, but they have windows. I might make them into elevator shafts by covering over the windows. I'm not all that certain which is the front and which is the back.

They are very stylistic, and that is OK. I'm going to leave the windows they way they are rather than put clear plastic behind them, or maybe glue black paper behind them. I might buy some more, if I can find them on AliExpress again. UPDATE: Here is the link, and they cost about US$3.00 excluding shipping.

Monday, April 6, 2020

Progress During Isolation

I can't say I've been living the life of ease since the stay-at-home "strong suggestion" here in Tennessee. Most of my time has been going back and forth between homeschooling the boy, my own online teaching, and dealing with the back and forth tension between TigerMom and "where do you thing she gets that from" strong-willed daughter. Despite all this, I've been working like a fiend, mostly 3mm stuff. Here are some of the fruits of my labor:


9K33 OSA also known in the West as the Gecko. Its a big SAM system mounted on a really big truck thing. Even though it is Russian in origin, Lavonia ordered a bunch of them for evaluation.


BRDM-2 with Sagger ATGM. Bovatopia has a lot of somewhat obsolete weapons, but so do most of the threats they face.


T-55 MBT. The Pico Armor site now sells the one of the right, which is a more updated model, according to Marcin who is the owner of O8. However, there seems to be a lot of the older style models still in stock, which is what you see on the left. This is Bovatopia's primary MBT, at least until more modern Chinese MBTs come on line. I kind of like the older model.


Above is a number of models painted up. In addition to the T-55s and the BRDM-2s, I have some BTR-40s, what I think are BTR-80s, and some AMX-13 light tanks. Early on in the struggle for Bovatopian independence, they managed to score a bunch of these light tanks. Like a lot of my fictional nations, obsolete weaponry are never junked. 


Last but not least, I made up some terrain. Above are dug-in markers that I made while I was making the bunkers for the SA-2 SAM. They are made the same with aluminum foil wrapped in polymer clay, then flocked.


Post on Cool Chainmail Game

I am writing up another post related to campaign thoughts, but I'm throwing this discovery up on a massive game using the old Chainmail rules. It takes me back when I used them in high school

Chainmail: Battle of Emridy Meadows

Mostly a lot of great pictures with out much commentary. If you are gamer of a certain age, see if you can spot how many classic Ral Partha fantasy and historical 25mm figures are in the game.


Friday, March 20, 2020

SA-2 Guidline SAM in 1/600

Corona virus situation has arrived in northeast Tennessee. Only one case officially reported, but things have more or less closed down. Technically, my kids and I are on spring break, but my son has been unwillingly doing online activities like Khan Academy, and I am dealing with very unhelpful IT people in trying to set up Zoom for online teaching. It will be what it will be in terms of online classes.  The upshot is that I have not had as much time as I'd like to work on the hobby. I am trying to get as much done as I can. Here is the finished product of that O8, SA-2 Guideline set.

Complete set + Radio truck

SA-2 SAM

Spoon Rest and Fan Song radars

Radio truck

Missile site

Spoon Rest is the early warning radar. The Fan Song is the guidance and tracking radar for the missiles. For the missiles and the Fan Song, I based them as if they were sitting around in dusty dirt. The Spoon Rest and the radio truck, I gave them my generic grass base as they could be used elsewhere. The radio truck didn't come with the set, but the missile site needed launch control location. It is hiding behind the Fan Song in the last picture. 

I found maps and diagrams made of permanent SAM sites. The missiles and the control radar are in earthen shelters. They are more extensive than what I've made, but I wanted to scale down the whole thing. I made the bunkers out of polymer clay and then flocked the outer side and made inside with the same modelling paste as I used for the bases of the missiles and Fang Song. 


Wednesday, March 11, 2020

The Saga of the Minotaur

I'm still clearing off the table of 15mm fantasy to get moving on my 3 & 6mm figures. Don't worry, I will be back working on them soon! I've got a SA-2 missile site I'm working on in 3mm. The missiles and their radar systems are done, but I am working on the site itself. On to my story:

I got this very nice minotaur from Splintered Light Miniatures called Giant Minotaur Warrior.

http://www.splinteredlightminis.com/gimiwa.html
He has a lot of really nice detail on him and I thought he'd add one more extra punch to my bad-guy barbarian army.

I was really proud of my initial paint job, until this happened:


The wash I used turned it into a uniformly brown, goopy mess! It obscured most of the highlights that I added especially on the hair & fur. The culprit:


I am not really sure why it turned out so bad. I've been mixing my own washes since the late 90s. My standard mix is Future liquid acrylic floor wax (or whatever its called now), with ink/another wash/paint/etc. I don't have a standard ratio as each pigment medium has different properties. I mix the two together, run the mixture across the ridges of a bottle cap with a brush, and if I like what I see, I use it; if not, I adjust either floor wax or the pigment. Inks have very fine pigments but are very intense. I thought I had made the right ratio. In addition to being too intense, the floor wax started solidifying very quickly. Again, I've worked with this stuff forever and I know how long I have to work with it before it solidifies.

So, I ended up stripping the whole thing with a combination of oven cleaner and Simple Green. I repainted it, but I feel it is just not as good as my original:

Left: Battle Valor Games, Center: Splintered Light, Right: Ral Partha Europe (Demonworld)
I did use a wash, but very sparingly. It was a mixture of the floor wax and black acrylic paint. No problems this time. I haven't condemned the Vallejo ink to the back of the drawer. I might try it again to see if I get better results on a different figure. Also, I use a Windsor & Newton sepia ink on my 3mm armies, so I might try the Vallejo and see what I get on those.

Sunday, February 23, 2020

Friday, February 21, 2020

Update on Life

Last week, I got that bile duct stone removed. My recovery was a little slower than I expected but I did get to work on some stuff including the SA-2 missile battery that I posted previously. But so far, so good.

Besides the missiles, my main project has been to help my son finish his pinewood derby car for this Saturday's race. Like most projects, I get bogged down on my ambitions. Adding to this has been my recovery from the surgery. By about 3:00 in the afternoon, I have been hitting a wall have little energy to do anything. Originally, I had plans to be mostly finished with the car last weekend, but Friday and Saturday was pretty much a bust. I think I was in bed by 7:00 last Friday. But if all goes well, we should be done tonight. Here is a work in progress picture.


The boy painted it. As you can see, it wasn't the neatest job, so I touched it up. When its done, there will be a driver in the form of a LEGO Star Wars minifigure. The holes behind the cockpit is to put lead weights in.