Showing posts with label After Action Report. Show all posts

Tuesday, July 7, 2026

Great War Salvo! Naval Rules

 I am currently at my home town which is a suburb of Chicago. I'm here to help my sister at least begin to clean up my mother's house to sell it, and to deal with some of her outstanding bank finances that for some unexplained reason, I must do it in present here and cannot be done online.

I was going to bring some of my painting supplies and some minis but it ended up that I brought one game, Great War Salvo! by Minden Games. 


I bought this about a year ago, but only did a quick read through. I read it again before I left for Chicago and thought it might be good contender as a relatively simple set of naval rules, it can be played solo, and you really don't need any miniatures. In fact, it can be played with a pad of paper and pencil, which is what I did just tonight. I do have their more comprehensive naval rules, Battleship Captain, but Great War Salvo! seems to be less complex. 

The book is divided up into basic and advanced rules, with some optional rules added that include submarines. Additionally, you get 12 pages of ship counters covering everyone involved in WWI. Ships include dreadnoughts, pre-dreadnoughts, armored cruisers, protected cruisers, light cruisers, and even armed merchant cruisers. The only thing you don' get are torpedo boats and torpedo boat destroyers. You don't get submarine counters either, but subs are a little more abstract. What allowed it to be a candidate for my potential pre-dreadnought wars is that they have a lot of pre-dread battleships as well as a lot of cruisers that were old enough to count. You probably cannot recreate the Russo-Japanese War as is, but I am somewhat a master of reverse engineering stats, so it would not be a big issue. 

There are a number of different factors, but they the usual types: floatation, turrets, armor, and speed. Hits on these causes loss of effectiveness.  Additionally, there are differences in gun effectiveness depending on whether you are firing broadside versus fore or aft. During each turn, players declare whether they are closing in, turning broadside, or withdrawing. This changes range bands. Weather is important, even in the basic rules. 

Combat is in two parts. First, you have to see if you can hit the target. It is a two D6 roll modified by range, but you do get a bonus if you hit the ship in the previous turn. If you hit, then you see if you damage the the ship by rolling three D6 this time and adding or subtracting modifiers. There are a number of modifiers but once you have run through combat a few times, it is pretty quick to tally scores up. Charts tell you whether or not you hit, if damage is taken, and what sort of damage occurs. Unlike some other rules I've used in the past, it is not a slow attrition of loosing hull points. There is plenty of opportunity for more serious or catastrophic damage to occur even in the basic game. 

The game does have an algorithm where the game is not necessarily a slugfest and combat can break off before a ship is sunk. 

For my first test game, I pitted the HMS New Zealand against the SMS Westfalen. I picked them because they were both on the same page. I played the Westfalen whereas has the AI played the New Zealand.


Weather was rolled to be fair and the ships started at Extreme range. 

Turn 1
The New Zealand got to go first and rolled to turn broadside. I chose to close in. This moved the range band from extreme to long. If I had also turned broadside, the range would have stayed extreme. The ship with the largest gun gets to shoot first. Shooting is not simultaneous, neither is damage. The New Zealand fired and hit me, but even with the +4 added to the to damage roll, it bounced off. The Westfalen fired but it missed. The armor factor of 4 on the Westfalen cancelled out New Zealand's broadside rating of +4. I rolled to see if the battle continued and it did. 

Turn 2
Again, the New Zealand got to go first and rolled to close. I decided to close as well. Because we both closed, we skipped the medium-long band and brought us down to medium range. New Zealand fired first but this time missed. I fired and also missed. Again, the battle continued. 

Turn 3 
New Zealand went first and turned to broadside, so I decided to turn broadside as well. The range stayed at medium. The New Zealand hit me and was able to cause damage. I took took 2 floatation points of damage but there were no further consequences in the basic rules. The Westfalen fired back hitting and causing damage in the form of a turret hit. This meant that from then on, the New Zealand gets a -1 when trying to do damage. I rolled and the battle continued.

Turn 4 
Getting initiative, the New Zealand rolled to close in. I decided not to press my luck and ordered a withdraw. The range stayed at medium. We both fired and hit each other but there was no damage taken on either ship. I was hoping to end the game, but the AI said otherwise. 

Turn 5
Pretty much a repeat of turn 4, with the New Zealand continuing pursuit,  but with both ships missing each other. 

Turn 6
Finally I got to go first, but I chose to continue to run. The New Zealand decided to turn broadside (maybe captain AI decided he was tired of missing or his shells bouncing off my ship). What that did however was to increase the range to medium-long. That slight increase in range was enough cause the New Zealand to miss (really low dice rolls didn't help). The Westfalen fired and scored a hit and knocked off a floatation point off of the New Zealand. Again, the AI determined that the show must go on.

Turn 7
Again, the New Zealand stayed at broadside while I continued to run. That furthered the range to long.
Again, the New Zealand failed miserably to hit me. I managed to hit him but no damage this time. Finally, the war gods of the sea looked favorably upon the Westfalen and called the battle over.

The game took under an hour to play. It probably would have been shorter but I had to get used to tabulated the pluses and minuses. I got the hang of things and by turn 4, things sped up. I'm sure there were some things I goofed up on or missed when adding up things. For example, ships are rated with different speeds. It seems that these speed rating are only related to the effects of speed on damage, at least that was is what it seemed in the basic rules. Also, one of the things I had to remember was that even though the game only uses D6 dice, different charts use different numbers of D-sixes. For example, many of the decision charts only use one D6, but as I stated above, the to hit chart uses two and the to damage chart uses three. 

I enjoyed it. Once I got the swing of things, the turns moved pretty quickly. I think the range bands can be converted to either squares or hexes that would really help if I was to play a multi-ship game. It would tough to juggle a game with only paper and pencil. 

Even though I don't have any miniatures with me, I do have paper, thin cardboard, and glue. I can draw up some quick and dirty ships. I should have brought the various gridded naval wargame rule books with me, but I my David Manley rules are all on pdf. I can have a mini solo naval con on the dining room table. 

Monday, September 8, 2025

Game of Team Yankee

 Friday, I got in a game of Team Yankee at Will's gaming store. I'm not sure why, but I enjoyed it more than the Fames of War game I played two weeks ago. Will ended up winning, but I enjoyed blowing up his Soviet tanks with my M1 Abrams. Surprisingly, ATGMs on both sides were not all that effective.  Here are some pics of the game. 


I also finished up another pre-dread warship. This is an one off, test ship.

I used layers of corrugated cardboard for the hull and used styrene plastic tubing for the gun casemates. I also experimented with using different materials for the main turrets. Not all that happy about it, but it helped me figure out what worked. It is very loosely based on the USS Olympia, which I didn't know was rated a protected cruiser. 

Monday, May 13, 2024

Plastic Solider Battle

 When my son was about five, I bought him a big bucket of cheap plastic soldiers. I was hoping my son would enjoy playing with them both alone and with his dad, that by now he would be an ardent gamer. Well, it never really happened, but once in awhile, he will have a game with me. In the past, the rule was to either line them up and throw them at each other, or we'd make "phew-phew" noises and designate who lives and who dies. In this latest battle, we used a D20 and rolled for who lived and who died. Why a D20? Why not. 

Movement and weapon ranges were rather fluid. Everything moved about 3 to 5 inches. Aircraft got unlimited range but could only be in the air for a turn. Ranges were about 6" though tank gun ranges were slightly longer.

A roll of 10 or higher hits unless the target is behind cover, in which case its 15 or higher. A hit automatically kills infantry, but tanks get a saving roll of 15 or higher to be destroyed. 

Machine guns and grenades get three rolls to hit and can target up to three infantry so long as they are next to each other. Bazookas act like machine guns against infantry. Against tanks, a bazooka get one chance to hit but gets a +2 on the saving throw die roll. Tanks firing get same as machine guns against infantry; but against tanks, it gets one chance to hit with a +3 against the opponent's tank's saving throw die roll. Aircraft could drop bombs that could kill five infantry but had to roll a 12 or higher. Against a single tank, it was 12 or higher to hit, but got a +4 against their saving throw.

The battle

Pre-battle singing of the Red Dot national anthem,
accompanied by bagpipes.

My left flank

My right flank. Infantry bolstered by some tiny tanks.

My squadron at the ready.

Enemy armored spearhead lumbers forward.

Notable cowboy mercenary Buck Sheboygan
joins the right flank. He's a crack shot with is
sawed off lever-action rifle.

The battle begins. Already in these early stages,
my troops are taking casualties. Two of my 
tanks have been destroyed.

An Ace up my sleeve? Rambo the Commando
begins to sneak round the napkin holder.
The darring plan was for him to take out 
the enemy's aircraft.

I launch one of my jets to even the score
from above, but it failed to score any hits!

Rambo the Commando is halfway around
the napkin holder........

............only to be cut down by enemy snipers!
It was almost as if they knew he was coming.

Carnage on both sides continues. Unfortunately
form me, the enemy still had some troops in reserve.

I try for another air strike. I managed to 
kill some of his troops but couldn't 
damage the tank.

My fighter bomber was attacked by
two enemy jets on his way back to base

My pilot was able to shake one of them off,
but not the other.

The enemy started moving in their reinforcements

Little did I know that the enemy had their
own cowboy. It was mano a mano shootout.

For a brief moment, a hush settled over the battlefield.
When the smoke cleared, only one man
was left standing.

But in a cruel twist, Buck Sheboygan 
gets taken down by an enemy machine gun.

In the end, only a few of my troops were left
along with my bag pipers. The enemy had won
the battle but paid a heavy price in men.

Sunday, April 28, 2024

Another Victory At Sea Battle

This game pitted the Japanese with three heavy cruisers, one light cruiser, and three destroyers. Will had three Fletcher class destroyers, and one Iowa class battleship. Guess who one? I did manage to sink all his destroyers, but he annihilated all of my ships mostly with the battleship. Trying to damage the Iowa was like trying to kill Superman using a pellet gun. Even my long lance torpedoes could not penetrate the Iowa's anti-torpedo belt. It didn't help that he got the initiative for all but one turn. Initiative not only determines who moves, but also who shoots. Some pictures:


Sinister grin on Will's face


My cruisers valiantly engage the Iowa


Float plane view shortly before the carnage

Couple of things:

First, Will failed to tell me that if I launched my torpedos at his battleship at an angle to its broadside, there were lower odds of hitting, but I could have bypassed the Iowa's torpedo belt if they hit.

Torpedoes are crap in this game. The Japanese really weren't all that effective, but the American's are even worse. You have to be point blank to hit anything with a torpedo. In a duel between my destroyer and his, we only hit each other when we used our guns.

As I said above, initiative also determines who shoots first. I don't think I would have had a chance anyway, but at least one of my cruisers was quickly sunk before it had a chance to fire back at the battleship.  

I had a good time anyway. I had just given a final exam earlier that morning, and there was some drama regarding a student who failed to show up for it. This entire semester has been, as my son calls it, "scibbiddy." Due to financial issues, not of the faculty's doing, we have been bearing the brunt of things, which has culminated in a whole lot of calamity, including the resignation of my department chair in anger.  Any time I can get away from work issues and dive into something fun, I am a happy camper. 

Sunday, April 14, 2024

Victory At Sea

I got to play a test Warlord Games' Victory at Sea naval rules at Will's gaming shop. It was SO nice to have a game and interact with others. It was a quickie set up. I had a Japanese heavy cruiser and two destroyers. My opponent, a friend of Will's, had the USS Northampton heavy cruiser and three Fletcher class DDs. Will acted as umpire. 


It was a pretty crazy battle. Ships were constantly circling each other, particularly the destroyers to get a torpedo launch in. Torpedoes have a very short effective range. Only my cruiser had the Japanese long lance torpedoes. Bottom line, the Americans sunk all my destroyers and heavily damaged my cruiser. I badly damaged his destroyers and sunk the Northampton with my cruiser's torpedoes. It  was decided that it was a minor victory for the Japanese in terms of points. I suppose the American destroyers could have pursued, but all of them had already launched their torpedoes. I had a reload of torpedoes ready to go, and probably would have taken down at least two of the destroyers before their guns got close enough.

The rules seem ok. I would need to play a few more games. It seemed like torpedoes are not at all effective particularly in terms of ranges. I'd have to compare it to other rules. I'm not sure if I want to buy the models. They aren't bad, but frankly, at 1/1800 scale, they could have better detail. I think GHQ's 1/2400 figures have a lot more detail to them. 


Tuesday, March 12, 2024

Another Game of Scifi Carnage

 My wife went for a few weeks in February to visit family in China, so the boy and I had time to ourselves. This meant lots of eating out a restaurants and watching cartoons and Disney+. 

We managed to get a game. As usual, it was a scifi battle. I really wanted to use all the fantasy and medieval figures I've been individually basing for Dragon Rampant rules. But it was scifi or no game at all. 

The battle consisted of opposing sides rushing each other. There was a loose objective where I had to protect the president of the Galactic Union from the bad guys. Here are a few pictures I took.

Machine gun armed recon vehicle makes an appearance.


The president of the Galactic Union and his
bodyguard await the impending doom

As usual, the cyborgs and their xenomorph "pets" managed to overwhelm the combined efforts of the Galactic Union alliance. Even the mysterious alien Rocky with is powerful laser beam eye could not make ad difference. He went down fighting with all the rest. Perhaps a mecha on the good guys side rather than a small scout vehicle might have turned the tide. 

As a change of pace, I used the felt game mat that I bought years ago. It added a little touch to the battlefield and removed the need for measurement. 

Wednesday, July 27, 2022

First Air Battle Over the Leek-Leek

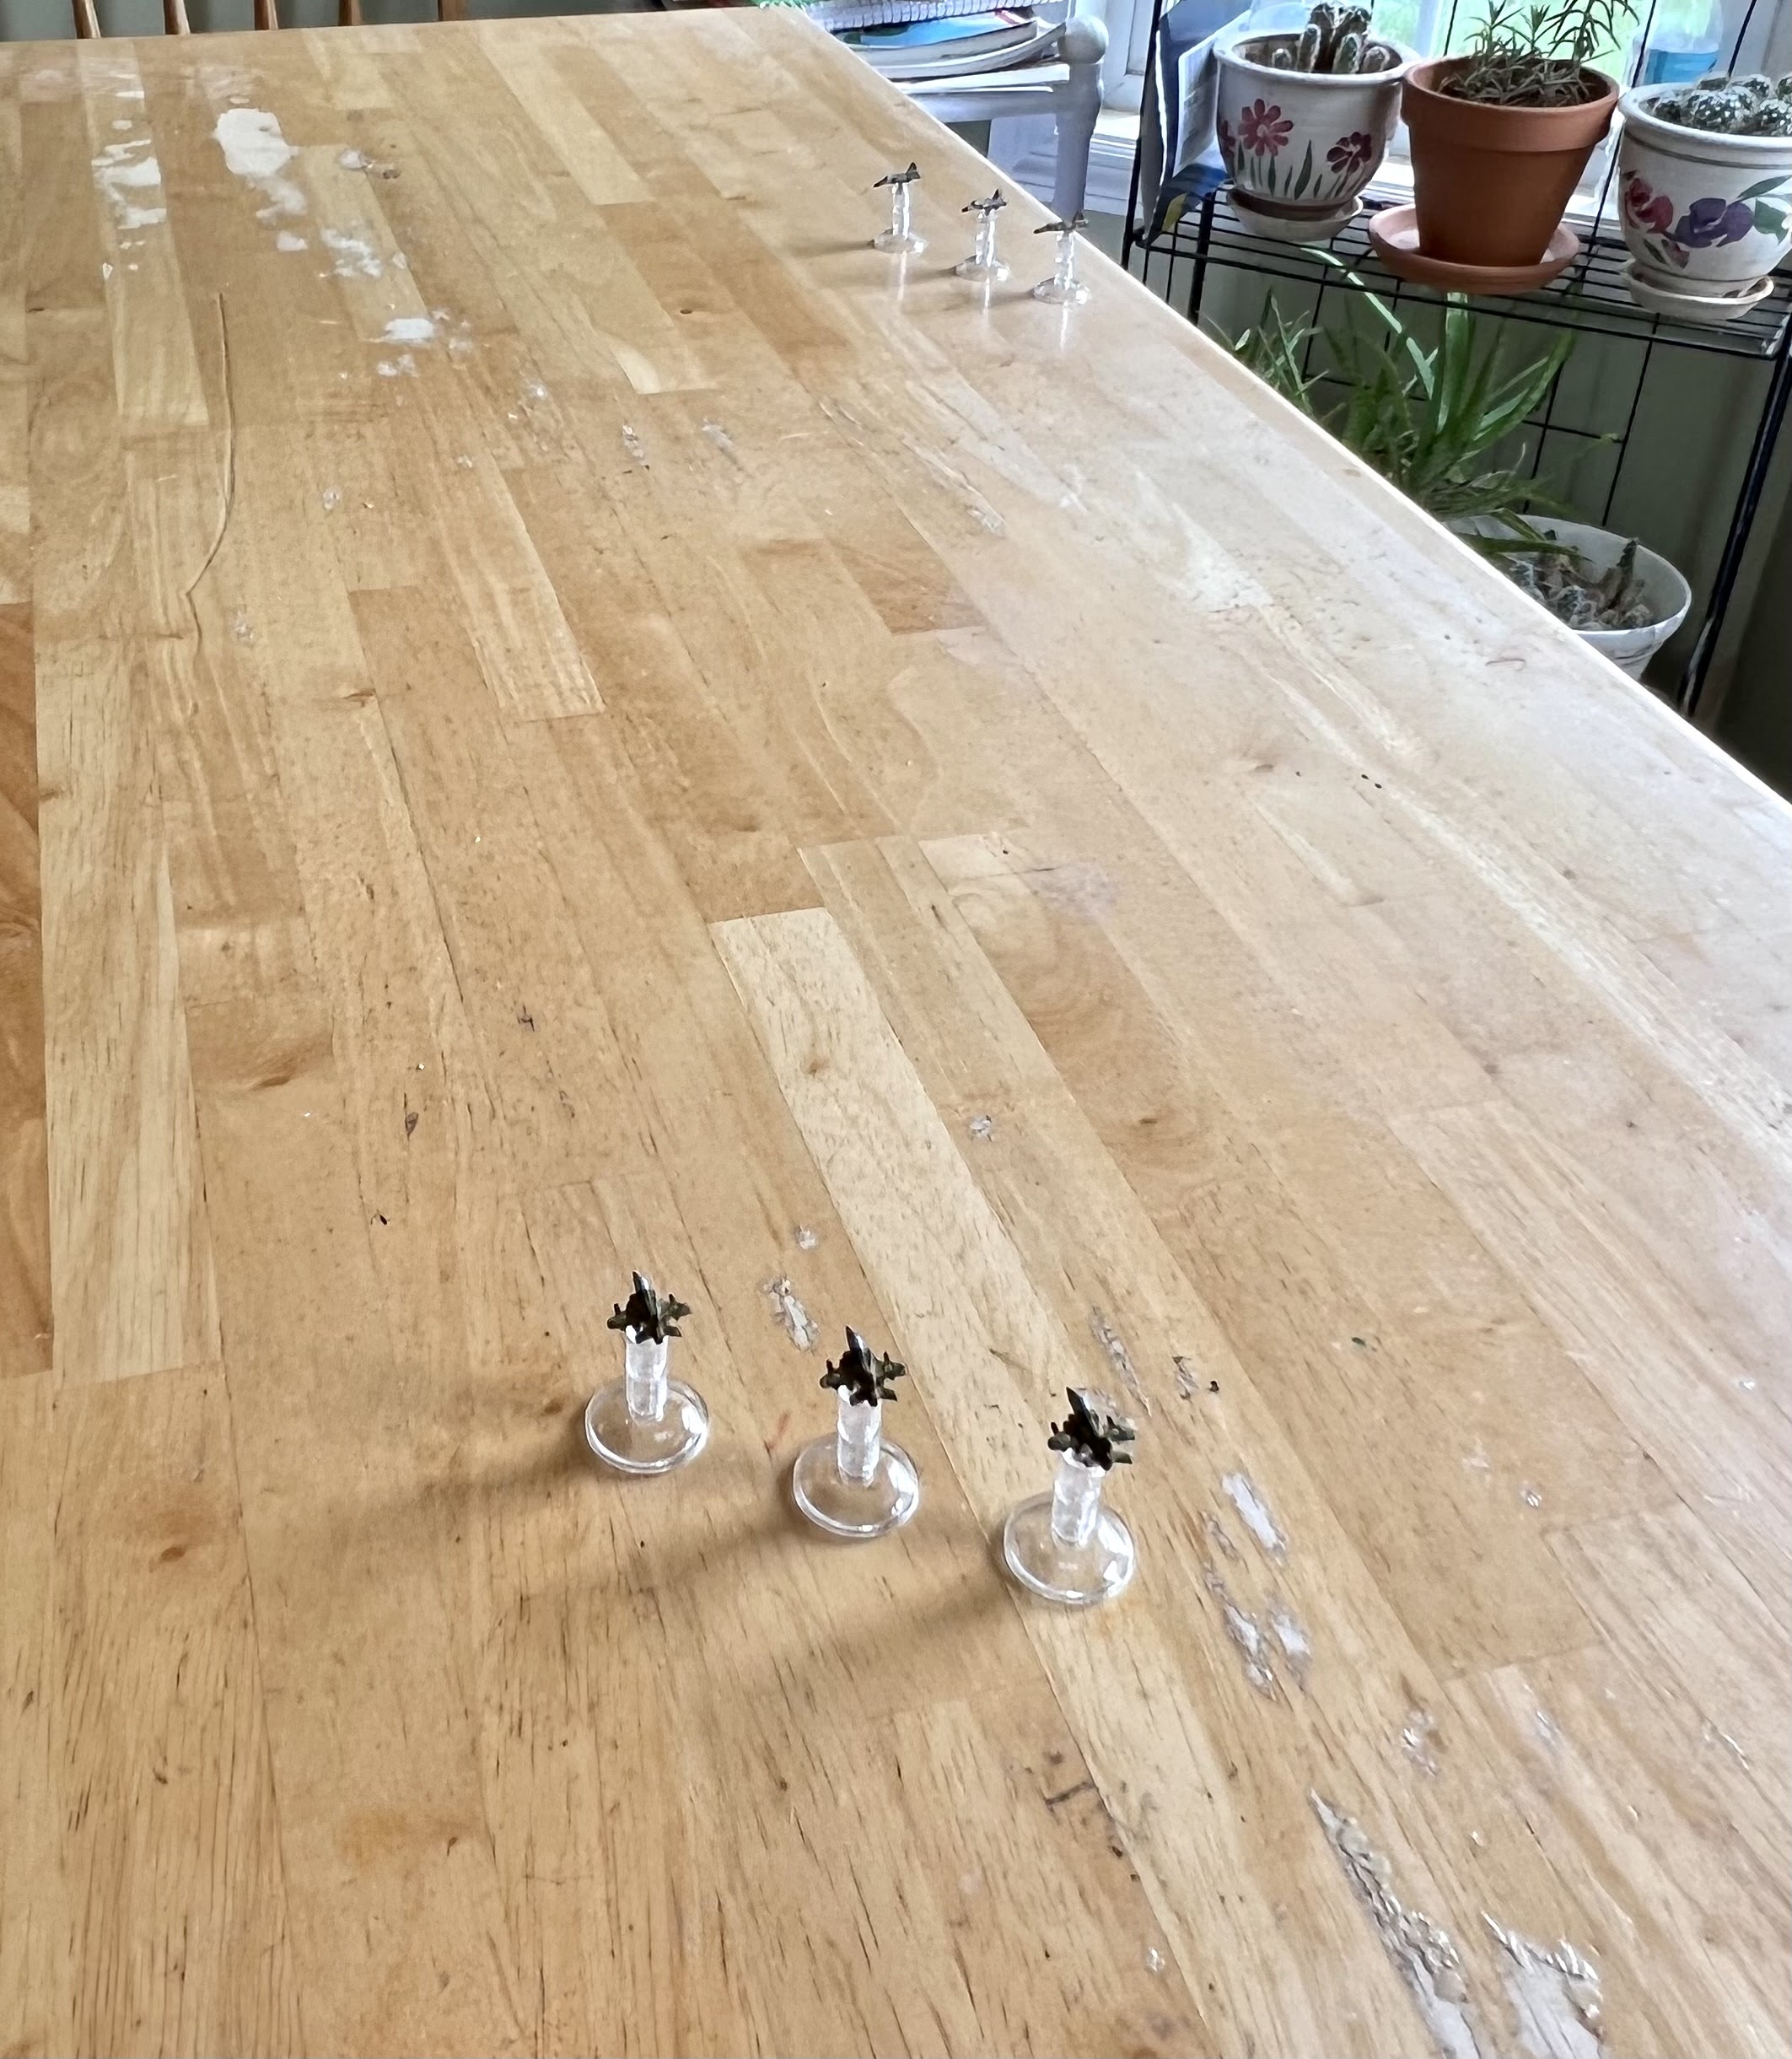
At 0600 hours, reports were coming in that Aquor-Ornur jets were flying over the region of the Leek-Leek National Forest. The commander of Sardeese AFB, which represents the Symbalian western military district, quickly scrambled the only combat-capable squadron still at the base, the 6th Squadron. The 4th and 5th squadrons, consisting of F-16s, were very recently transferred east. It was up to the 6th Squadron to take on the aggressors. Unfortunately, 6th Squadron consisted of the Hawk 200 fighter. These are light, multi-role fighters have yet to be tested in air combat. By 0700 hours, the 6th Squadron was heading to the border to defend Symbalian air space. 


The Match Up
Aquor-Ornur now has two types of fighters: the F5A Tiger II, and Saab JAS 39 Gripen. The Gripen is a more recent acquisition from Northern Chalupistan. The more veteran pilots as well as hired mercenary pilots fly the Gripens. The old Tiger IIs are flow by less experienced pilots. I rolled a D6 with a 50% chance of the Symbalians intercepting either. They rolled the Tiger IIs.  Rules used for this battle: AirWar: C21 with the ranges cut in half to accommodate my kitchen table.

Symbalian Hawk 200 light fighters.

Aquor-Ornur F5E Tiger IIs. These are painted in
Southern Chalupastan colors, but Aquor-Ornur's 
paint scheme is close enough.

The Tiger IIs have the advantage over the Hawk 200s.  They are faster and have a higher power rating than the Hawk 200. The Hawk 200 has a modern radar system and can carry four AA missiles, rather than two on the Tiger II. Both sides carried the AIM-9P3 Sidewinder missile. This is an all-aspect, heat-seeking missile. To compensate for the shortcomings of the Hawk 200, I gave the Symbalian squadron one pilot rated Good (the flight leader), and the two others rated as Average. The Aquor-Ornurians had one Average pilot (flight leader) and two pilots rated Poor. 


The Battle

Turn 1 

Looking from the east. The F5Es can just be seen
at the upper right edge of the table.

I rolled for where the two squadrons would enter from.  Aquor-Ornurians (abbreviated A-O for now on) entered the board from the north. The Symbalians came in from the east and had the advantage of the sun behind them They hoped that would add to their favor. Their better radar picked up on the A-Os first and they increased speed to try to catch them at their beam. The A-Os, still unaware of the Symbalians, maintained their course and cruising speed. 

Turn 2

The A-Os spotted the Symbalians, increased speed to maximum, and changed course to intercept. Both closed in.

Turn 3
Getting near weapons range, both sides started maneuvering to get behind each other. One of the Symbalians successfully performed a Barrel Roll, while another did a simple turn. The flight leader tried to execute a Barrel Roll and Turn that would have lined him up for a kill:


Despite his pilot rating bonus, the Symbalian flight leader failed. Not only did he find himself in a position he didn’t want to be, he greatly lost speed. Meanwhile, two of the A-O jets split off to the left and right to go after the Symbalians, but the one plane in the center flew straight and ended up almost nose to nose with the Symbalian flight leader:


 The two jets simultaneously fired their guns. Neither one could miss at such close range:

Guns a Blaz'n!!

The Symbalian flight leader gained a bonus damage die whereas the A-O pilot had a reduced number of damage dice due to his poor rating. The amount of hit damage to both fighters was enormous and both planes were destroyed. The Symbalian flight leader, though wounded, managed to successfully eject from this aircraft. The A-O jet was obliterated with no chance of the young pilot surviving. 

Turn 4
Both sides successfully passed a morale test due to the losses and the battle continued…but only for a short time. One Symbalian failed a Barrel Roll and Turn maneuver. The other Symbalian attempted a Split-S and failed that one: 

The Symbalians can't catch a break when it comes
to complex maneuvers!

The failed Split-S maneuver cost him two points of damage for excess speed. On the other hand, the two remaining A-O pilots, even though they were both rookies, successfully executed an Immelmann and a Break Right Turn respectively. Because of the failed maneuvers, neither Symbalian jets were in a position to fire missiles or guns. The both A-O jets launched a Sidewinder that found their targets, hit, and shot the Hawk 200s out of the sky:


Fortunately, both pilots successfully ejected. Their rescue transponders indicated they were sill in friendly territory. Helicopters were dispatched to pick them up. The two A-O F5Es turned west to head back to base to celebrate their victory and memorialize their fallen comrade. A-O commanders on the ground were satisfied with the outcome. At least for now, attack aircraft and helicopters will be unimpeded in their support of ground troops invading Symbalia!

Postgame Analysis
Chuck Yeager said about air combat, "It's the man, not the machine." This did not seem to apply to the outcome of this battle. I blame the loss of the three Symbalian fighter jets on poor rolls when trying to pass the special maneuvers difficulty ratings. It led all three into harm’s way. The flight leader’s roll was so low that not even his +1 allowed him to execute it and he ended up virtually face to face with his opponent because of the failure. Unlike other rules, pilots have to pass a difficult rating test to successfully execute what they call a special maneuver. AirWar C21 really has some major penalties for not passing the difficulty rating test. Not only do you not end up where you wanted to be but you often lose a lot more speed. On top of that, failures mean the aircraft does not get its particular defensive bonus for that maneuver. It is frustrating, but it does make for some interesting outcomes. I will give another set of rules for the next air combat game.