Showing posts with label Materials & Methods. Show all posts

Tuesday, August 4, 2026

Hot Glue Stick Turrets

As I have mentioned previously, I struggle with making ship turrets and especially gun shields for my pre-dreadnought project. I have not been happy with the material used to make them. Rubber erasers sort of work, but even these are not perfect. 

Facebook posts these short videos (I assume they come from Tik Tock, or maybe segments from YouTube videos) that show people making tiny pieces of furniture, bicycles, and other objects out of scrap material. There is one guy in particular who uses hot glue sticks to make things. He isn't using them to glue things together but as material for when he needs a circular base. I started playing around with the glue sticks. It seemed to have similar properties to an eraser, but better. What I noticed was that its solid but not that hard to cut.  It seems harder than an eraser but is a little easier to slice. I can poke holes in it and it won't potentially tear, and when stuck a piece of wire into a hole to make a gun, the glue stick didn't deform as much as an eraser. This is particularly important when using thin slices to make gun shields. 

Results of my experiments 

First up is a basic cylindrical turret. One of the advantages of the glue stick over wood and cardboard is that I can line up the wires better so that they are more parallel. Very often the guns will not be parallel next to each other when using other other material. The translucent stick makes it easy to watch and control the angle of the needle as I poke holes in. 


The next type is a oval turret. After cutting consistent cylinders, I sliced off the edges on either side of the cylinder and then angled the end where the guns went into. One of the advantages of the glue stick over the eraser is that you can push and pull on the wire guns to help line them up better. An advantage of both the eraser and the glue stick is that you don't need to apply any glue to hold the guns in place. I doused the turret closest to the camera with superglue, but it didn't help one way or another. I think I was pretty consistent with slicing off the edges of the cylinder, but I think I can do better if I use a razor blade rather than my craft knife. 


Finally, I made some gun shields using the cut offs from the turrets above. I still need to practice but I think they are a big step up from what I have experimented with up to this point. The "carvibility" is equal to an eraser and there was much less distortion the shield when I pushed the wire through to make the gun.  

Final thoughts
I used mini glue sticks that have a diameter of 0.7mm. Standard glue sticks have a diameter of 12mm. I will probably buy a pack of the standard. It will give me a little more area in which to carve different shapes and give a little more surface area to build triple turrets or use slightly heavier gauged wire. I wish there was an even smaller diameter of glue stick. That would be useful for smaller turrets and things like sponsons. 

I have not glued the turrets to anything yet and was a little worried about whether superglue will stick to solid hot glue. However, the people making their little objects use superglue all the time to glue them in place so it should not be an issue. I do not expect painting to be an issue either. I think paint will hold to the glue fine. 


Friday, February 27, 2026

Gun Shields

 Gun shields are the most ubiquitous means of defense for small caliber guns. They should not be that complicated to model them, and yet I find that they are. My previous posts show examples of how I've tried to make them. I have yet to be happy with the results.  Materials used for the gun shield is one factor. Wood splits and thin cardboard bends in ways that I don't want to. Consistency is another issue. It is difficult to make them all the same size. Once you make them, I find it very difficult to try to shape them to look like something more than a tiny cube. Additionally, it is difficult to drill tiny holes that run true from one end of the material to the other.  

Styrene rods to make shields

The gun shields for the above light cruiser uses 2mm x 2mm styrene rods. First, I drill a hole and then glue the wire in for the gun, then I cut the whole thing off. The result is the gun and its shield ready to go. I mark off the length of the gun using an acrylic paint pen, but once I make several, I line them up to make sure the lengths are reasonably consistent. I would like to have the front of the shield to slope a little, but I have yet to figure out how while keeping them consistent. I discovered I had a package of 2.5mm x 2.5mm rods that I will use for a larger caliber gun. That 0.5mm increase might be just enough to modify the shields.

Experiments in unusual materials

Many years ago, before the widespread use of blogs, there was a web site of a fellow that focused on modern microarmor gaming. I wish I could remember who it was because I attribute my interest in modern armored warfare (pretty much anything post-WWII) to the after action reports on his website. In addition to the time period itself, he also showed that it was possible to modify microarmor. One of the materials that he used was erasers (!?!). He used it because it was a material that was easier to carve than plastic, and it had no grain to deal with. 

I tried using the white vinyl erasers but those are too soft and tear easily. Next up the pink erasures. They are soft, but firmer than the white ones. It is easy to cut into them but they don't tear up, especially when you poke a hole in them to push in a metal wire for the gun. 

As a test, I grabbed some old pencil erasures that have been sitting around at home from my kids' elementary school days. 

You can see on the picture above where I cut out the gun shields. Below the end result before painting:

The lip of the eraser had was curved and beveled at the edge. This gave the shield a more realistic design. It also didn't tear like the white erasure did when I poked a hole in to put the gun in. It was more difficult to be consistent in dimensions when I cut out the shields. Also, I glued them down with superglue gel. I hope it holds. Maybe contact cement will work better.  

I will show the painted results in a later post.


Sunday, March 23, 2025

My Birthday Present

Its my birthday and I wants it.

Saturday was my birthday. I decided a week before that I would buy myself a present. Its not often that you turn 64 and have a song about it. What I wanted was a foam cutting table. What I needed was an ultrasonic cleaner. It is not often, but there are times when I need to clean minis. Occasionally, it is when I buy another person's figures and I want to repaint them, but more often, it is due to a catastrophic painting disaster, usually involving bad primer. A voice inside of me said, "no, don't do it!", but I had a can of almost full automotive primer that was sitting far in the back of the shelf in the garage. I don't know if it was the primer itself, or that the temperature in the garage was suboptimal, but the result was at least 50+ guys coated with a very grainy primer. I soaked them for a week in turpentine and then for about five days in Simple Green. Even with an old tooth brush it did not get much of the primer off. So, I went to a local discount tool store called Harbor Freight and got an ultrasonic cleaner. 


These used to be very expensive, but are now more affordable. It was well rated by the miniatures community. I did a test run and it definitely sped up the cleaning process. I still needed to go over a few with the tooth brush again, but for the most part, I am pretty happy with how well they got cleaned. I think there seems to be a correlation between the type metal and the ease of cleaning. Essex miniatures, which are of a softer metal, seemed to resist cleaning more than compared to either Museum Miniatures or Khurasan Miniatures. Both have harder metal. For my next cleaning project I bought a whole bunch of 3mm WWII and modern miniatures awhile ago, and want to repaint those.


Friday, June 14, 2024

More Test Shots

I did some more test shots using my light ring on 15mm fantasy figures. They are better lit, but still look like crap in close up. They seem to loose their depth and three-dimensionality and look like they are poorly painted pictures. 

I look a picture of Baron Henri of Emoree awhile ago, but I thought I'd add a few more. For entertainment purposes, the barony of Emoree is a large county in the kingdom of Zarnagol. After the king of Zarnagol was killed in a final climatic battle, Zarnagol was plunged into civil war as many of the lords of the land did not recognize the king's infant bastard son as the legitimate heir to the throne. They were more against the child's mother, a powerful sorceress, who declared herself the royal regent. Conflict has died down over the years with little resolution as to who is to be king. Those who opposed the illegitimate heir pretty much do what they wanted and pay little, if any, lip service to the regent. The child is now 16, and with is mother's urging is trying to unite those loyal to him and make him the true king. Baron Henri fully supports the young heir, but many of his neighbors to the east, oppose him.

Baron Henri and his entourage. All are
Demonworld minis expect the knight on
the baron's right who is a Khurasan mini.

His household men-at-arms.

Slightly different angle.

The Baron's court wizard Zandu. Flanking him
are the Baron's battle champions. 

I threw up a brown background for the fourth picture. It seemed to have darkened them a little without hiding parts of the figures in shadows, which is what often happens without a light on them.


Tuesday, June 11, 2024

Test Shots With New Phone Light

 In one of my many endless quests for perfection, I recently purchased a ring light for my phone. My photos of figures always look like crap, and its often due to poor lighting. It was all of about $9 at Walmart, so I though why not take a chance. There are my results:

The first test shot. This was done using the light and natural daylight. 

 In the evening, I did two comparison shots. First shot is my normal way which is to adjust my Ott light to light up the figures. The second is Ott light + phone ring light.

Typical workbench light

With the phone ring light attached

I sent the pictures to a friend of mine and asked which he thought was better. He preferred the one with the ring light attached. He thought the other looked more garish. Of course, he didn't have the actual minis in front of him, which could bias his opinion. Also, I didn't tell him which was which in terms of the lighting used. He did say that the mounted elf and the orcs where I used the ring light were very shiny looking and wondered if I had used gloss paints. For the elf, yes; I had not sprayed it flat yet and a lot of washes dry glossy. For the orcs, I had already deglossed them. They seemed shinier than the elf especially the banner.

The quest will continue. 

Thursday, April 18, 2024

Homemade Game Tokens

Being burned out on the fantasy stuff, I turned my attention back to my imagiNation campaigns and started to take stock in where I'm at for those. I really need some sort of markers or tokens to denote the status of vehicles and units. I know a lot of people use different color beads, but for some things, I think the marker needs to have either something written on it or a clear symbol of what it represents. A long time ago, I had bought some blank wooden dice to use as markers, but they are too big. So, I turned to these 3/8" steel circular discs I got off of Amazon.com for basing really small 1/600 miniatures like jeeps or small MANPAD or ATGM teams. I really have not used that many, so I thought they'd look like a good size for both 1/300 and 1/600 miniatures. I have a whole mess of small washers, they they seem a bit too large. Here's my test run of them.

I glued them onto a piece of paper. They look like those old dot candies that were stuck on paper! Once dried on one side, I cut them out and glued the other side down on paper.

I then painted both sides and lettered them. For my first batch, I made targeting markers. The green with black number is the unit firing. The corresponding red with white number is the firing unit's intended target. I tried making it fancy with the cross hair design around the number. 

On the back of every target marker, I painted yellow and wrote "hit" on it to indicated if it is hit (I'll bet you didn't see that explanation coming). I'm still deciding if I should write down the firing unit's number below hit. It might be useful if I have different weapons shooting at the same time. 

For all the tokens, I hit them with a clear spray to seal them. I can't decide what put on the back of the firing unit. I also plan to make some that indicate being pinned or suppressed.


Tuesday, August 1, 2023

15mm Stone Walls

If you have followed past posts, I was spending a lot of time and effort to scratch build stone walls for 1/300 scale. Most of these attempts were less than satisfactory in my view. Having spend a lot of time recently painting up 15mm medieval and fantasy figures, and having made some 15mm structures in the past, I decided I wanted to make a few stone wall pieces at this figure size. 

If you watch any of the tutorials out there on making your own terrain, the number one building material is pink insulation foam. It the modeler's dream material. It can be cut, carved, and embossed. Buy a foam cutter and there is no limit on what you can do.  Unfortunately, pink foam is getting to be rather expensive. If I go to my local home improvement store (called DIY stores in other countries), I would have to buy it in large sheets that cost around $40 and that I don't think will fit in my minivan. In the USA, many of these stores will no longer cut a lot of building material because of potential toxic dusts and work safety concerns. Frankly, I don't really need 4'x8' sheets of the stuff.

What I used for my walls are the foam trays that are used as a sturdy base for packaging food items such as cuts of meat. One of the complaint that I heard about using this material is that it cannot be embossed.  I found that if you use a craft knife or single-edge razor blade, you can shave off a thin layer of the outer surface leaving a squishier surface that can be embossed. There is also different grades of this packing material and some seem to be closer in consistency to the pink insulation foam. The foam I used for my first wall section was more resistant to embossing even when I shaved it. Another foam tray (shown below) was more pliable.  Of course, its the luck of the draw what you end up getting. 

I cut strips of the foam of a more-or-less uniform width. I then embossed the stones with a ballpoint pen. Once embossed on both sides, I then glued them onto thin craft sticks that I bought for another project I'm working on. I rounded off the tops a best as I could using my craft knife and some light sanding. 


In addition to the long, straight sections, I also did some corner sections. I tried to make the ends of the wall sections as flush as I could, but they are not seamless continuations. 


For one of the long sections, I decided to have a gate. I built it out of pieces of styrene plastic. 


Once the glue dried, I sealed the walls with a mixture of Mod Podge, black, and burnt umber craft paint. When that was dried, I went over the stones with repeated dry brushes of gray. The base I painted brown and then flocked.


I was surprised that once I figured out the technique, I could quickly put out a number of walls. I think the whole project took about two nights to complete three long sections and two corner sections, and that was because I wanted to sealant to dry thoroughly. The gate was probably the most time consuming part of the project. Is it a high quality job? No. But it looks fine for the table top. 

Tuesday, July 12, 2022

Wooden Hexes

I ordered these about a month ago and am now just picking them up. 25mm hexes look a lot tiny-er than I envisioned, but they will do for my air combat games or ship battles with 1/6000 models. I will carefully glue them together and then mount them on some sort of board.

Wednesday, February 16, 2022

Another stab at basing aircraft

 I got these clear acrylic bases from Litko by way of Amazon. It was a little tricky making the rod perpendicular to the base in all directions for some of the stands, but I think I managed to pull it off. Instead of magnets, I cut tiny squares of steel bases and glued them on top. It gives a strong hold but not so much as to pull the magnets off of either the plane or the base. Plus, I don't have to worry about polarization. The hexagon bases will be perfect for the AirWar: C21 rules. I've been re-reading them and I think I now understand some things I was fuzzy on in the past.


Thursday, October 29, 2020

Testing a New Method of Flight Stand

 I dread helicopter models for two reasons. First, they are a pain to put together. They always have "fiddly bits" as they say across the Pond that drive me nuts. This is more of a problem with 1/300 models than 1/600 but I have a hard time attaching those clear plastic disks that represent spinning rotors at that scale. Second, attaching a magnet to the bottom of the model is a pain, particularly on 1/600 models. It is bad enough that those rare earth magnets do not stick well, but the helicopter models tend to be either too narrow, and/or have landing gear that interferes with a good attachment. Some time ago, I was grumbling about this in one of my posts (I grumble a lot). Pahoota of The Solipsist Gaming blog recommended using staples as a bridge between the aircraft and the magnetic stand. So, I tried his suggestion:

1/600 Hind with staple stand bridge

 I broke off a block of four staples from a larger block. They are fused together, but I needed to be careful as it is easy to separate one from the rest. It was a little too long to use as is, so I carefully bent them and then cut off the bent piece. Sorry, I don't have a picture to show what I mean but you can see on the part of the staple that is holding onto the magnet where I cut it. I then glued one side to the helicopter with the other end going onto the magnet. So far, it seems to work ok. One advantage of this is that I can paint the helicopter while holding the stand rather than the model. I've been using staples for paper for 1/600 helicopters but I might try heavy-duty staples for 1/300 helicopters. I think it will also work well for very small aircraft. I recently got some 1/600 Pilatus PC-9s, which at that size can pass for either a Super Tucano or an AT-6B. They have very thin fuselages, so the staple bridge might work better than even a narrow cylindrical magnet.  

Tuesday, July 28, 2020

Tale of 3mm Woe

I am finding more and more frustration as I dabble in 3mm/1:600 scale armies. The frustration is with the infantry. When it comes to WW2 and Modern ground forces, Oddzial Osmy (sold by Pico Armor in the USA) is the only game in town. The issue is that they are cast in a very hard metal. I don't know what the alloys are in it, but its a lot harder than miniatures like GHQ that use a lot less lead if any. I totally understand why this hard, brittle metal is used, BUT the problem comes down to the infantry. They are on strips. The infantry needs to be cut from the strips. Unfortunately, the sculptor didn't put deep enough break points between each figure so that they easily snap off. A good pair of wire cutters are needed. The issues that I've had include figures flying off into space (thank god for safety glasses) to only get lost in the carpet, and due to the brittle nature of the metal, a number of figures break off at the knees. 

A recent prepping project has revealed an improved method of removing infantry from their strips as well as a new means of stripping old paint off. I had painted up a bunch of infantry, but when I gave them a dark wash, they looked horrible. So, I decided to strip them. 

I tried a number of different solvents including Simple Green, but nothing worked. Consulting the web, I found several that were touted to be very effective. Being where I live, the only one I could find was this stuff called LA's Totally Awesome. 

I don't know if it is made in Los Angeles, or they use it there, but that's the name. Man, did it work well!
In about three days, the miniatures were pretty well stripped of their paint down to the metal. However, the cleaner seemed to have reacted with the metal and left this thin powdery film of oxidation on the figures. Sorry, no pictures, but it would have been hard to see much anyway. A normal tooth brushing could not remove much of it. In comes the Dremel brush.


A metal brush tool would probably have been safe on metal this hard, but I opted for nylon brushes. They worked pretty well and buffed off most of the oxidation and any paint that still clung to the figures. 

Now onto second half of the story. 
I got them cleaned but now the issue was to cut them out. This part I dreaded. In the past, I have used my Dremel tool with a cutting wheel to thin out the base between two figures and it seemed to work well. 


I started doing this with this batch of infantry, but for whatever reason, more figures where having their legs broken at the knees! What saved me was a pair of pliers. To clean off the oxidation from the figures, I held the strip with the pliers. I did the same while using the cut off wheel, holding them tightly between the figure to be cut off of the strip and the one next two it, which usually was the one that got broke off at the knees. My guess is that the vibration of the cut off wheel on the metal broke off the legs. As I said, this metal is very strong, but very brittle. Holding the strip tightly reduced the vibration and allowed me to thin down the base to snap off the miniature successfully.
 

So, happy ending! I got the figures stripped and enough cut off to mount them onto their bases with no further leg casualties in the process.


As a note of caution, I could not get absolutely all of the oxidation material off of them. Also, the metal is no longer shiny but a dull gray. Hopefully, re-priming and painting them will not cause any more oxidation. In the future, I might spray them with a clear coat just to be safe. On larger figures, I still use spray primer, but with this tiny guys, I use a brush on. 

Friday, February 7, 2020

Primerpalooza


Many a mini were primed last night
After feeling victorious in the battle to glue the SA-2 missiles to their bases, I primed them and a whole bunch of 15 mm figures using Vallejo's brush on primer. It seems to work just as well as Mr. Surfacer's primer and I don't have to deal with nasty fumes from the lacquer thinner. Up to this point, I've been just spraying the 1/600 figures directly with camo paint to save some time. But its been raining every single day for the past week or so, and spray paint and high humidity do not mix. I have figured out a few colors that are a very close approximation to the Kylon camouflage spray that I use for the Bovatopians, so I will just brush paint them instead of waiting until who-knows-when to spray paint them.


Tuesday, January 21, 2020

Experimenting with Flight Stands

I've been playing around with some different ways to mount 1/600 aircraft on to stands, and the stands themselves.

I as much as I like rare earth magnets to mount jets, there are some drawbacks to them. First issue I have was when I had a magnet on a model as well as on the stand. I tried really hard to make sure the polarities matched, but I didn't always get that right. Second, it was very hard for me to make sure the magnet was mounted on the model so that it was level. Third, rare earth magnets do not like to stay glued.  I suppose that drilling a hole into the model and inserting the magnet into it might have taken care of at least the second and third issue, however, I don't know if my hole would have been any more level than just gluing the magnet on. So, to solve this for at least some aircraft, I glued a tiny piece of steel the bottom.


Using tin snips, I cut out a tiny piece of metal off of some can top. I pounded it out with a hammer to make sure it was as flat as possible, then I glued it to the model. I did have to slightly file down the spot were I glued on the metal piece, but this model of a Mirage 2000 was pretty flat to begin with. Here is what it looks like on a stand.


The advantages are that I don't have to worry about magnet-to-magnet polarity issues, it is a lot easier to make sure the metal piece is level, and it sticks well to the model. The big drawback is that I cannot use this technique with some models. Many of my helicopters and some jets need the metal to project out beyond the bottom of the model. For example, I have some attack helicopters with weapons slung on either side of the bottom. If I didn't have the small cylinder rare earth magnet projecting out, there would not be a contact with the top of the stand.

The second experiment was the stand itself. If you read two of my posts where I play test some rules, you might have noticed some differences in stands. One stand is my LEGO stands. I like them a lot, but it is somewhat difficult to change altitudes. The second stand was a jury-rigged steel base with 1" cylinder rare earth magnets. These are potentially easier to swap out to show changes in altitude, but they have the annoying effect of being so strong that they will pull other bases to each other if close enough. So here is my an experimental base I've come up with:


The stand is a piece of styrene plastic. On it, I glued a piece of metal. The metal cylinder is not a rare earth magnet, but a 5 mm diameter peg used for shelving brackets. The ends are not perfectly level by any means, but its not horrible. The peg is connected to the base by a small magnet. In turn the jet has a magnet glued to it. The hope is that the magnetic field of the two tiny magnets are not strong enough to drag another stand to it, and the plastic base will provide enough of a buffer zone, so to speak.

If all goes well this week, I plan to have another air combat test game using these stands.

Thursday, July 19, 2018

Let There be Light!


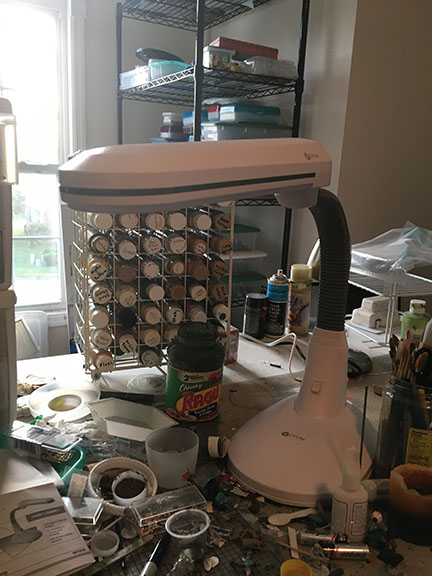
While I was in Chicago for two weeks, my daughter dragged me to JoAnn's Fabrics. Ott Lights were a whopping 50% off! Not only couldn't I resist, but I bought one for my daughter, too. This one is a big step from my old one because it has a larger light. The goose neck will mean I have more flexibility lighting positions and hopefully will hold up longer. My last one's arm became all droopy early on and I had to prop up the arm with a bottle of craft paint.

Also, I got a hold of Bob Cordrey's latest rules. This time on naval wargames:


This is a printed and expanded compilation of some of his rules that he has up on his website. I mentioned them in a old post. I've played his pre-dreadnought rules solo a couple of times and really like them. Of the three rule books of his that I now own, I think I like this one the best.


Thursday, June 7, 2018

Still Without Good Lighting

Its USTA Juniors tennis finals season, so my days have been on the road. My daughter did pretty well at the Tennessee state finals. Because of that, she was seeded for the upcoming regional games. What does that mean for gaming? Not much other than we leave Saturday rather than tomorrow. This lowered my blood pressure somewhat. I was rushing all day today trying to get ready, and then I got the news. So I managed to sneak in a little painting between packing and all the other crap I have to do to get ready to go. Packing and be completed tomorrow.

I think I solved my problem with O8 3mm infantry. They are cast in some very hard metal and the infantry come in strips.  It has been next to impossible to separate the tiny dudes without either sending one into orbit or snapping them off at the knees. So, I powered up my old Dremel tool and bought some thin cut-off disks. That did the trick! I ground down the bases between each infantry man enough to easily cut them off with a metal cutter, and they don't go flying off into the unknown!

I am still without good lighting. I borrowed a goose neck lamp from my daughter. Its a small one so it doesn't cover much area in terms of light. Also, it uses an old daylight bulb so its a sickly yellow glow. My local craft store USED to carry lights for craft purposes, but not any longer. I guess all that frew-frew junk is more important. I guess I need to order one, but I am too crazy about shipping charges. Well, with all the upcoming trips this June, I will not be really needing it until maybe July.

Tuesday, May 29, 2018

RIP Ott Lamp

Last Thursday night, as I was in the process of finishing up some Cobblestone Castings 15mm Picts, my Ott desk lamb blew up! It didn't really blow up, more like a big belch and then death. The previous two nights it was doing odd power surge things. The light would brighten then dim, then go back to normal. Thursday it continued, then there was a big BURP! sound that came from the power switch box, then nothing. I don't think it was the bulb. That looked fine. I had to finish up the Picts in rather dim light.

I've always had problems painting large areas of exposed skin. I am never really happy with the results. This time, I used a sort of Dallimore method of painting, which I am not too crazy about. To me, they always look like a color-by-numbers painting where the shadows and highlights do not blend much. My guess it that at a certain distance, the eye is tricked into blending the shades together.  Here is the results of my experiment:

The Fury of the Picts!
What I used:

Skin
Base coat: 1 part Army Painter Barbarian Flesh : 1 part Michaels Craftsmart Brown
Middle coat: Army Painter Barbarian Flesh
Highlights: 2 parts AP Barbarian Flesh : 1 part Vallejo Basic Skin tone

Hair
Black, highlighted gray
Very light gray with a black wash

Weapons
Wooden shafts and handles: Burnt Umber
Leather straps: various leather paints that I have
Chert spear points and axe heads: various colors of turquoise, red, and gray. Then either a dry brush highlight and/or black wash, depending on the size and amount of relief on the stone.

Fur Loincloth
Orange-brown craft paint and then black wash

Skulls
Some of them were carrying a skull at their sides. Maybe a bonus for excellence in savagery? Parchment White craft paint and then black wash

Unlike other figures, I was deliberately skimpy on the black wash. I restricted it to the above. I thought about washing them with a final coat of skin tone shade or a mixture of burnt sienna and clear floor wax to make them more tanned. But I decided against it.

Its too bad that Cobblestone didn't do more of his line of Barbarica 15mm figures. I wish he had put out a command pack for these Picts. It would have been nice to have some chieftains and shamans to spur the tribes on.


Monday, March 26, 2018

BeeSPutty

Today's mail-order purchase, BeeSPutty:


It's a polymer clay, but sculpts more like a wax than a clay. What does that mean? According to those in the know, you do more carving rather than with regular sculpting clay. It has more "memory" than other modelling materials like Greenstuff. It is also sticky, which means you can affix pieces onto each other better than with conventional clay.

There are some guys on the Facebook 15mm fantasy group who are using it to make figures. Awhile back, I started sculpting faces onto Splintered Light Miniatures' armored ogres. I thought this might do a more detailed job than polymer clay.

Its a lot more expensive ($10 for a 3.5 oz. container) than a comparable amount of polymer clay, and so far the only place in the US where you can buy it is from Bombshell Miniatures.

I bought two containers, one for me, and one for my daughter who has really gotten into making charms out of polymer clay. She has pretty much absconded with my polymer clay. I thought this would be fun for her to try out.


Wednesday, March 21, 2018

1/285 Scale Saab 105 and Scratch-Built Gun Pods

It took over a month for me to get it, but I finally got my Shapeways order. I'm not going into the ugly details on how many trips it took to the post office, the time spent both on the internet and on the phone to track down the correct shipping number, but for the price you have to pay, you would think express mail would be faster and smoother than good old US mail. 

Among my purchases were two Saab 105 trainers, one of which is shown below:

Saab 105
They were a pain to separate as they have a pretty thick sprue attaching the two planes. Fortunately, the designer put the sprue at the two plane's bellies. I managed to saw them apart with a razor saw without any damage. As you can see, the plane is blue,but that is a superficial layer of plastic. When I cut the sprue off, the plastic below it is white. I'm not sure what the purpose of the outer blue layer is. The surface is pretty frosty, but I think using gesso or Vallejo's brush-on primer might smooth out some of the graininess. 

Why the Saab 105? If you have not figured it out by now, I like obscure weaponry. There were several variants that were modified for ground attack. Although I can't find the source again, I though I read somewhere that some were used during the various wars in the Congo. The model does have hard points. What the 105 doesn't have are built-in guns. Enter the gun pods....

Gun pods. Ruler is scaled for 1/285

These guys are probably the toughest scratch builds I've made so far...probably tougher than the light machine gun I made that cost me a drop of blood. They are made of styrene rods of 2.0mm diameter that I shaped using an emery board and my little chopper. The hardest part was the gun.  The gun is a very thin wire. I bore a hole in the front end of the pod using a small needle that I heated up with a candle flame (the soot is why parts are black and gray). The wire was glued in with CA-glue and it was very tricky trying to get the wire to be vertically and horizontally true. I'm not sure how successful I was. Once secure, I snipped off most of the wire with one of my older sprue cutters. 

They don't represent any specific, real life gun pods. They are definitely not perfect, but once glued to a hard point and painted, they will look ok. I have plenty other ordinance to mount on my Saab 105s like laser-guided bombs, and rocket pods are pretty easy to make.

I'll get pictures up of the planes when finished. 


Monday, January 29, 2018

Another Attempt at Static Grass

Against my better judgement, I decided to order one of those static grass boxes. It wasn't exactly cheap but it seems like static grass applicators in general are not cheap. My primary use of static grass is for spiffing up figure bases rather than large terrain pieces. Also, static grass seems to be very messy even when I applied it by hand. With kids around, I don't want to use something that could cause respiratory problems. There are two brands that I know of. I found out from some reviews on YouTube, that one that one brand is better rated than the other. The highly rated one has not been available for as long as I been thinking about buying one of these boxes. So, I ended up buying the WW Scenics Pro.

What you get


Besides the box, you get two packs of static grass of different lengths, a small bottle of glue, an instruction sheet, and a folded sheet of paper. I almost threw out the sheet of paper, but a Youtube review informed me that it was for making my own truffs. The instruction sheet is not very detailed. Besides not telling me what the piece of paper was for, it could have done a better job of telling me how to use it. It did tell me what sort of battery to use, so I guess that is a good thing. Speaking of batteries, here is the little hatch to insert it:


It was not the easiest thing to open. I had to use a staple remover to get it open. To to sound picky, but "SLIDE OUT" would have been better than "PULL OUT." I thought the hatch flipped open. Inside it slides out like a file drawer.

I test it out
Based on the YouTube video, I decided to conduct my tests outside. It was breazy and slightly overcast this Saturday, but I decided to test it out. About a month ago, I bought one of those electric fly swatter kind for about $40 made by a company named GrassTech. It is, in fact, a repurposed electric fly swatter. One thing going against the fly swatter is that the wire for the alligator clip is very thin and looks like it could easily break.

There was no way I could take any action pictures. The flocking went way too fast, plus a good gust of wind would blow the grass off the applicator before I started. If you are unfamiliar with how this box works, you put the grass on the box, then put the alligator clip on the object you want flocked. Holding the figure upside down over the box, you then turn it on. The grass flies up into the air and supposedly onto the figure.


I used PVA glue as the adhesive. For test subjects I used two 15mm fantasy figures that recently finished and based. I used both some old, 2mm flock and the longer flock that came with the WW Scenics Pro.

My old nemesis
WWS box applicator using Woodland Scenics grass
A lot of waste
WWS box applicator using WWS 4mm flock
After a few hours (sorry about the blurry picture)

After a few hours of drying

Fly swatter applicator using WWS 4mm grass
My conclusions
First, to be fair, a windy day is not the best time to be flocking outdoors.  The breezes caused the grass to arc away from its intended target as it left the box. This seemed to be slightly less of a problem when I used the fly swatter.

I was warned by the YouTube video that grass was going to go flying all over the place, and it did irregardless of the wind. This resulted in a lot of waste grass, much of it sticking all over the box. This was much less of an issue with the fly swatter.

I has a little more control using the fly swatter compared to the box. Once I flipped the switch on the box, the grass went flying off of it all at once. It seemed that the mesh that held the grass caused the grass to leave the fly swatter more slowly. This allowed a little more time to move the applicator in various directions.

Static grass size seems to be a contributor to success. The 2mm stuff looks like crap. It doesn't look all that much better than if I had just thrown the grass on with my hand. The longer 4mm grass looks somewhat nicer. Nonetheless, I am not that impressed by the outcome of either applicator. There are as many grass fibers lying down as there are standing up vertically.

The verdict? Meh. Had I known, I probably would not have bought the box. Since I've paid as much as I did, I am going to use it, but probably the fly swatter more. Also, I will use it in the garage where there is no breeze but I don't have to worry too much about the grass getting all over the place. I'm also going to look into other types of adhesives. Maybe PVA glue is not the best, but it seems like that is what others use.